Intro
Another guide is available:
the Minetest Modding Online Tutorial Book is a more complete and easier to understand guide in learning to mod Minetest.
Minetest has a scripting API (Application Programming Interface), which is used to program mods (short for "modifications") for the game, extending its features and adding new items.
This API is accessed using an easy-to-use programming language called Lua.
The only thing you will need is basic programming knowledge. If you don't have any programming experience, you can use Codecademy to learn. It will teach you the basics of programming (it is JavaScript, not Lua, but still helps).
More specifically, the version of Lua is 5.1. Reference manual, book
Path of user data
See Installing_Mods.
Modding basics
Types of objects in Minetest
There are the three types of object that can be defined in Minetest. The type of the object is important as it plays a part in the properties of that object.
- Node (minetest.register_node): A block from the world.
- Tool (minetest.register_tool): A tool/weapon that can dig and damage things according to tool_capabilities.
- Craftitem (minetest.register_craftitem): A miscellaneous item.
Mod packs and item names
Each Node, Tool and Craftitem needs a unique name to identify it in the API.
The name's format is like this: modname:itemname. In this case, the mod is called modname (name is preset by the folder name) and the block is called itemname. In this tutorial, we will make the node tutorial:decowood.
For example, default:dirt is the unique name for dirt.
Mod folder structure
The following describes the folder structure of a mod. The only required file is init.lua
mods
|-- modname
|   |-- depends.txt
|   |-- init.lua
|   |-- textures
|   |   |-- modname_stuff.png
|   |   \-- modname_something_else.png
|   |-- sounds
|   |-- media
|   \-- custom_data
|
\-- another_mod
mods— Path to Minetest's mods.modname— The name of your mod.depends.txt– List of dependencies.
List of mods that have to be loaded before loading this mod. A single line contains a single modname.init.lua— Main Lua script.
The main Lua script. Running this script should register everything it wants to register. Subsequent execution depends on Minetest calling the registered callbacks.textures,sounds,media— Media files (textures, sounds, whatever).
These will be transferred to the client and will be available for use by the mod.
Define a node
We are going to make a mod that adds a special kind of wood that can only be used for decoration.
First, create a folder called tutorial in the Minetest mods folder (see installing mods).
Next, create a file called init.lua and paste in the following:
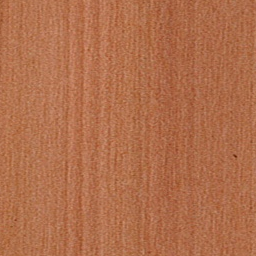
minetest.register_node("tutorial:decowood", {
	tiles = {"tutorial_decowood.png"},
	groups = {snappy=1,choppy=2,oddly_breakable_by_hand=2,flammable=3},
})
You can download the image by right clicking tutorial_decowood.png and then click save as.
The function minetest.register_node(name, table) is responsible for adding new blocks to the game. Nodes are blocks as well as torches, signs, etc.
It takes 2 Parameters: The name of the new block tutorial:decowood, and a table containing the properties of the block.
The name of the block MUST start with the mod name, followed by a colon, eg. tutorial:.
In this example we define the following properties:
tiles— Sets the texture of the block; You can use only 1 texture or multiple textures, separated by commas{"tex1.png", "tex2.png", …}. The game checks for the texture files in ALL textures folders of the game.groups— This sets attributes about the block including the time it takes to destroy the block, and the tool required. It also defines that the node will burn when is close to fire or lava.
Try it out
Launch the game now, and notice that the mods are automatically loaded and compiled.
This means when changing the code you simply have to "Exit to Menu" and "Start Game/Connect" again to try out the changes.
Let's try out our first mod! Open the chat window in-game (press t) and type /giveme tutorial:decowood 99. This will add 99 blocks of the decorative wood to your inventory!
 Note: The "give" privilege is required for the
/giveand/givemecommands to work. In singleplayer you have this privilege by default. On servers a server admin has to execute/grant player_name give
Define a crafting recipe
Minetest also uses different crafting recipes. Therefore it is important to know what crafting means and how to code it.
Crafting means to create tools, blocks and other stuff. Minetest offers a 3 × 3 crafting grid by default with one output slot.
A stone pickaxe can be made out of 2 sticks and 3 cobblestone:
C C C     <--- S = stick, C = stone group (cobblestone, stone, desert stone, …)
  S
  S
Let's make a crafting recipe for the decorative wood.
Just add this to your init.lua file:
minetest.register_craft({
	output = 'tutorial:decowood 2',
	recipe = {
		{'default:wood', 'default:wood', ''},
		{'default:wood', 'default:wood', ''},
		{'', '', ''},
	}
})
The function minetest.register_craft() registers a crafting process, it defines the recipe for something.
It takes 1 parameter which is a table that contains 2 properties: (and an optional third)
output— which sets the outcome of the crafting process and recipe which is the actual recipe for the output.recipe— must be a table with other tables inside. Every of the 3 tables defines another row of the crafting field. Every row contains 3 columns.type— if you want to make it a furnace craft addtype="cook"
Let's define a cooking recipe to see how that works. This will allow the node to be placed in the top of a furnace which will convert it to another item. Fuel must be added to the bottom of the furnace for the craft to take effect.
minetest.register_craft({
	type = "cooking",
	recipe = "tutorial:decowood",
	output = "default:wood",
})
Let's also define a fuel recipe. This will allow the node to be placed in the furnace to fuel cooking recipes.
minetest.register_craft({
	type = "fuel",
	recipe = "tutorial:decowood",
	burntime = 7,
})
You can use the craft recipe checker when modding to check for typos.
- Why are wooden planks not simply called
woodbutdefault:wood? - Indeed, The name of a node/tool/craftitem object must be
modname:name(with two exceptions:airandignorewhich are built-in). In this case, the mod is calledtutorial(name is preset by the folder name) and the block is calleddecowood, so it'stutorial:decowood. - The
defaultmod is the most important “mod” in Minetest, in fact Minetest itself is more like just a game engine, all the contents, materials, and other stuff are in several mods, likedefault(standard tools/blocks),bucket(Buckets: Lava/Water), and many more. - If you want to find out more about these mods and maybe use features they contain, just have a look in their init.lua!
- Windows:
Minetest/games/minetest_game/ - GNU/Linux, run-in-place:
~/.minetest/games/minetest_game/ - GNU/Linux, non-run-in-place (such as a package):
/usr/share/minetest/games/minetest_game
Define an ABM
ABMs add actions to blocks. For instance, the tutorial-wood could become normal wood after a few seconds.
Append this code to your init.lua:
minetest.register_abm({
	nodenames = {"tutorial:decowood"},
	interval = 30,
	chance = 1,
	action = function(pos)
		minetest.add_node(pos, {name="default:wood"})
	end,
})
Try it out! It's really annoying to see all your decowood creations destroyed after 30 seconds, they simply become normal wood.
But how does this work? The function minetest.register_abm() registers an action for each block of the same type.
nodenames = {"tutorial:decowood'}means that the action is processed for each decowood block. You could also try"default:stone"instead of that to turn all stone blocks into wood.interval= 30 means that the action is performed every 30 seconds. It starts counting at the beginning of the game. After 30 seconds all actions are processed, it doesn't matter when the block was placed. - This is not a per-block timer!chance= 1 means that the probability of the action is 1:1, it happens in every case. A higher value means that it's less probable (eg. 1:2, 1:3, …).action = function(pos)is the function that is actually performed.
It contains the command minetest.add_node(). This takes two parameters:
First of all the position parameter (more information later) and also a table which defines the properties of the block, e.g. the name, the direction it faces. In this case the name is enough to define what block you can see.
So let's assume we want to create a mod that makes junglegrass grow above every dirt-with-grass block. This should be a slow process, one dirt-with-grass block after the other should be grown over. This is what we do:
minetest.register_abm({
	nodenames = {"default:dirt_with_grass"},
	interval = 2,
	chance = 100,
	action = function(pos)
		pos.y = pos.y + 1
		minetest.add_node(pos, {name="default:junglegrass"})
	end,
})
You should already know everything else but the line pos.y=pos.y+1. What is that for?
To understand it, you should know what a position variable in Minetest is a table made up out of 3 values: x, y and z.
x and z are forward/backward; left/right values. y is the up/down value. The player usually spawns near 0,0,0.
The line pos.y = pos.y + 1 manipulates the position to 1 block above the dirt-with-grass node.
There are some small other differences to our first abm. The interval is 1 in this case, but the chance (probability) is 100. Therefore the function is executed every second, but only in 1 of 100 cases. This makes your Minetest garden slowly been overgrown by junglegrass.
Where to go next
Have a look at the Minetest Modding Online Tutorial Book for more complete guide.
Check out the Mod Releases forum to see mods that have been published by the community.
Get mod help from the modding questions thread.
Suggest a mod idea in the mod request thread.